
There are a few different ways you can attach a headboard to a wall. These options include using Command Adhesive Strips, attaching it to a freestanding headboard, or mounting it to a bed frame. Which method is best for you depends on the materials you use, your wall surface, and the location of your headboard.
Mounting a freestanding headboard
If you have a freestanding headboard, you might want to hang it to a wall. This is a great way to add extra support while you read in bed, and it also makes it more durable. But, before you start, you need to make sure you have the right tools.
A stud finder is a handy tool for locating studs behind a wall. It’s also a good idea to have a friend to help you lift the headboard. Alternatively, you can use drywall anchors.
Freestanding headboards are a lot more flexible than traditional headboards. They can be placed on the wall where the bed head is, or they can be mounted. You can also mount them to your bed frame, which is a good way to keep them sturdy.
First, measure the height of your bed frame. This will give you a general idea of the size of the headboard you need to buy. However, you’ll need to double check the math. That’s because the exact measurement can affect the way the headboard hangs on the wall.
After you’ve got your measurements, you need to pick the correct type of mounting hardware. There are many options to choose from, so you need to decide what’s best for your needs.
One of the more obvious choices is a wall mount. This can be done by putting a bracket in a stud, or by installing a bolt. Another option is to use a toggle bolt.
The most important thing is to make sure your fasteners are secure. You’ll need a wrench to tighten them. If your bolts extend beyond the leg hole, you’ll need to slip a washer on top.
Finally, you’ll need to install the headboard. There are a few steps to this, including making sure the finished side is facing the bed. Some headboards come with pre-made markings that will guide you through this process. Other types require you to drill holes and attach them to the wall.
The wall-mounted headboard has been around for a while. Now, you can find it in a wide variety of styles.
Mounting a headboard to an adjustable bed frame
When it comes to installing an adjustable bed headboard, you have many options to choose from. You can attach your headboard to the base of the bed, or you can mount it on the wall. It depends on your own preference.
The first step is to measure the distance between the mounting holes on the headboard and the brackets on the bed frame. This is important because you need to make sure that the mounting holes on your headboard and the slots on your headboard brackets line up with each other.
Next, you need to decide on the best size screws to use. These screws should be the same size as your headboard, and should be able to screw into the brackets on the adjustable bed frame.
Once you have these things, you are ready to mount your headboard. Make sure that you have a steady hand to hold the board while you do it. Also, you will need a second person to help you.
Depending on the brand of your headboard and the style of your adjustable bed, you will need to use different types of fasteners. Typically, these fasteners come with your headboard. But if they do not, you can always get a set of headboard brackets to make the job easier.
First, you will need to make sure that the screws you have are long enough. If the headboard bolts are too short, they might snap off of your headboard, and you may end up with a wobbly headboard.
Second, you need to be careful that you do not over-tighten your screws. Over-tightening them will lead to stripping of the threads.
Third, you need to make sure that the flanges of your headboard are aligned with the holes on your adjustable bed frame. To do this, you need to slide your headboard brackets 1.5 to 2 inches away from the edge of your mattress.
Fourth, you need to make sure that the studs on your wall are positioned correctly. Use a stud finder to locate them.
Fifth, you need to decide on the right height for your headboard. The height of your headboard is important, because you want it to be aesthetically pleasing, but not too high.
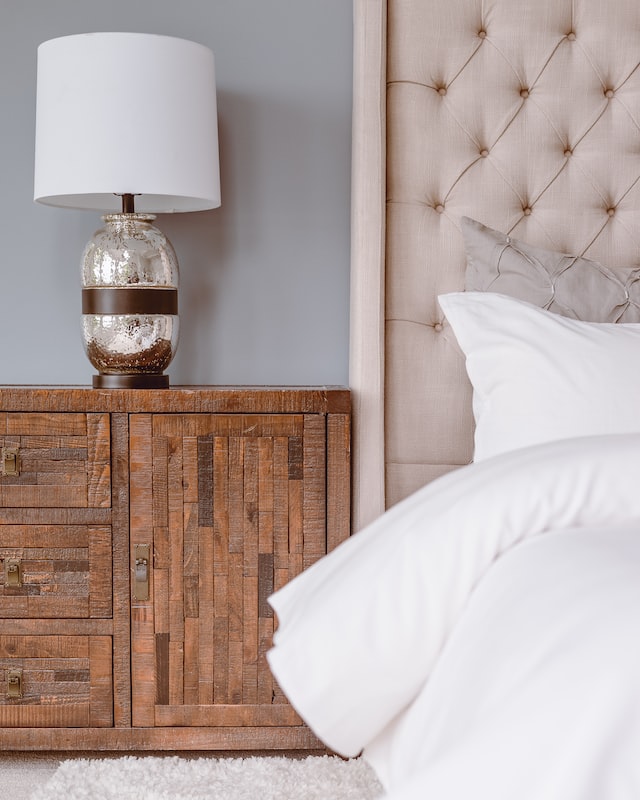
Mounting a wall-mounting headboard
Wall-mounting a headboard is a quick and easy way to add a functional and decorative piece to your bedroom. You can choose a custom-sized headboard or buy one that is pre-made. But you need to know a few basics before you start.
First, you’ll need a bed frame. Depending on the style of your bed, you may need to drill mounting holes to mount the headboard to the frame. If you have a picture frame, you’ll need a stud finder to locate the studs behind the wall.
Next, you’ll need some headboard mounting hangers. The hangers should match the solid wood backing of the headboard. They should also be angled upwards so that the brackets catch the headboard.
Unlike a standard headboard, a wall-mounted headboard doesn’t have struts. This allows it to offer more stability. It will help prevent your pillows from falling out of the bed and hurting you.
Once you have your hardware, you’ll need to install the headboard. Headboards can be heavy, so you’ll need steady hands. Make sure you have the right tools for the job.
Using Command Adhesive Strips, you can attach the headboard to the wall. These strips can hold up to 16 pounds. Alternatively, you can use toggle bolts to fasten the headboard.
To avoid a gap, it’s best to make sure the bottom of the headboard is at least three inches below the top of the mattress. You can use a level to make sure that the mounting brackets are straight and level.

If you have a heavy-duty item, you might want to consider using flush mount brackets. They can be found at any home improvement store. However, they’re only effective if the brackets are flush with the wall.
A final option is to use a French cleat. These can be bought at any hardware store. They’re a simple bracket that enables you to mount your headboard without drilling any holes into the wall. Simply fasten the cleat with an angle sloping up and lock the cleat into the wall.
If you’re not sure about your capabilities or if you don’t have the time, you can always hire a professional. Especially if you’re not used to working with tools, you might find it easier to let a pro do the work for you.
Mounting a headboard to a wall using Command Adhesive Strips
If you want to hang a headboard to a wall, there are several different ways to do it. While many options require you to drill holes, there are other ways you can hang a headboard without doing any drilling at all.
The first step is to determine if the wall is a stud. This is important because you will need to use a leveler to make sure that the mounting holes are evenly spaced. You will also need a stud finder.
Once you’ve identified the studs, you’ll need to lay out all of the hardware you’ll need to attach the headboard to the wall. This includes the headboard itself, the screws, plastic anchors, and command hooks.
Before you begin drilling, it’s best to lay out the hardware to make sure you’re using the right pieces. For instance, you might need Command strips for the middle section of the headboard.
Command strips are similar to tape but they’re much sturdier. They’re designed to hold up to 16 pounds. However, they can lose their stickiness when drastic changes in room temperature occur. Also, it’s important to keep in mind that these strips only work for one time.
After you’ve made the initial hole, you’ll need to install the mounting brackets. These should be matched up to the cleats on the wall.
Next, you’ll need to insert the bolt into the washer and the nut. Be sure to press down firmly to ensure the adhesive bonds securely.
When the frame is ready, you’ll want to apply pressure to the Velcro strips. This will help the adhesive bond to the wall. It will take about an hour for the adhesive to properly set in, though.
To ensure that the frame is level, you’ll need to mark the corners. Using a yardstick, you’ll be able to place the second board in a level position.
If the fabric is heavy, you may need to add Command strips to the middle of the frame. Alternatively, you can use a pair of interlocking Z-clips. These clips can be adjusted to help you keep the frame level once it’s hung.